- A +
- A
- A -
An internationally renowned research institute needs to conduct a comprehensive inspection of the processed nuclear devices and compare the digital patterns of the products. In order to improve the nuclear processing technology and improve quality.
Practical problems
1. The nuclear device has a large shape, a complicated shape, and a large number of holes, and has high requirements for the accuracy of the acquired three-dimensional data.
2, the traditional measurement method data acquisition density is not enough (insufficient data volume) and the surface and curvature of the nuclear device can not be measured, can not be detected normally, and can not reverse mapping later. The workload is large, the efficiency is low and the precision is not high, which does not meet the requirements of customers.
solutions
The three-dimensional scanner performs three-dimensional scanning on the nuclear device to obtain high-precision three-dimensional data, and finally generates a detailed detection report, and the position deviation condition can also be numerically displayed, which can completely replace the traditional detection means.
1. Preparations in the early stage
Spraying the developer: Improve the background color contrast of the sample surface for better scan data.
Marking points: The acquired data is positioned and stitched in the scanning software.
2, 3D scanning
After learning about the company's specific situation, Huaguang 3D engineers scanned it with a combination of 3DW and 3D scanners. 3DW has a large-format scanning function, which is very suitable for scanning large objects. The machine is very stable. The scanning process is only one hour with an accuracy of 0.05mm, and the 3DX can accurately scan those holes and improve the nuclear device detection data.
3, three-dimensional detection:
The acquired nuclear device 3D data is imported into the detection software Geomagic Qualify, which can quickly detect the difference between the nuclear device (CAD) model and the manufactured parts of the product. Geomagic Qualify can display the difference between the two in an intuitive and easy-to-understand graphical comparison.
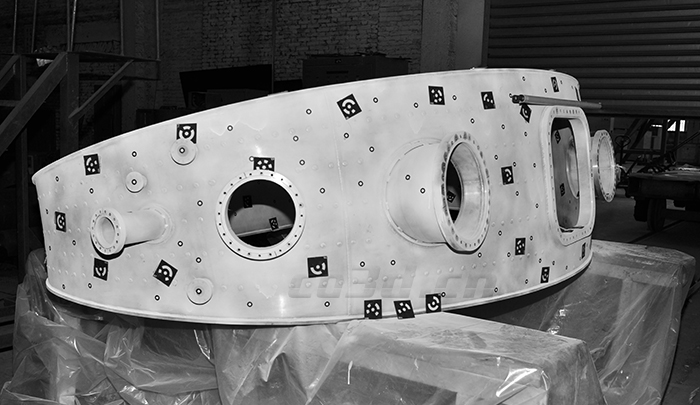
Nuclear device scanning pre-work
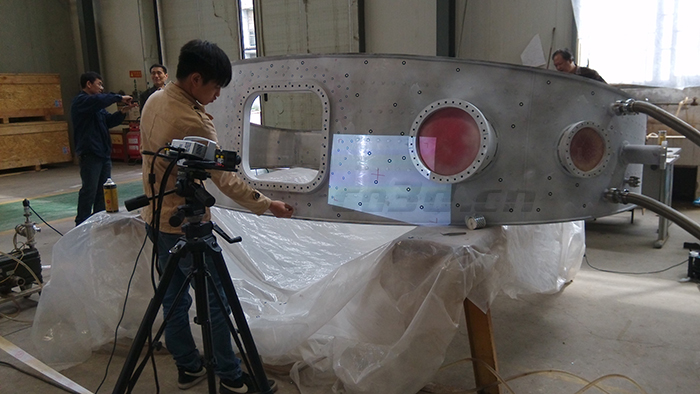
Nuclear device field scan
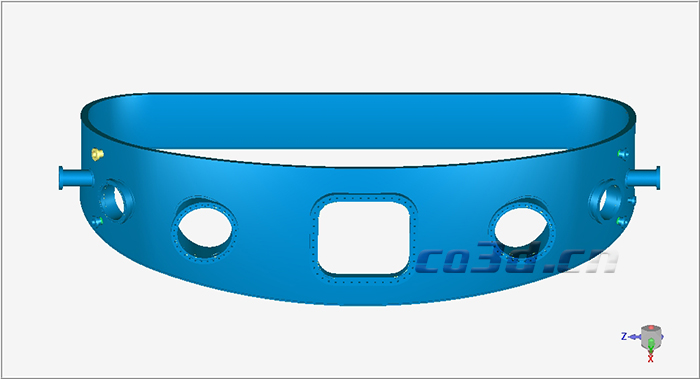
Nuclear device STL data map
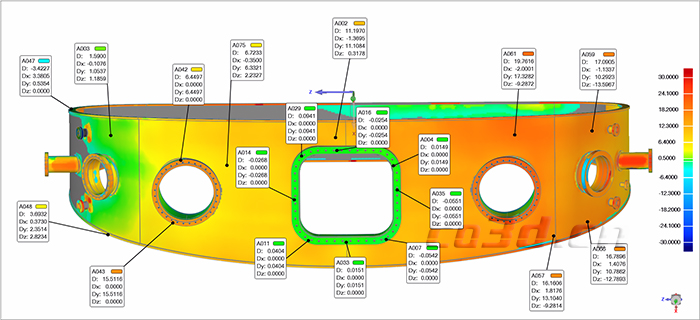
Nuclear device comparison test chart
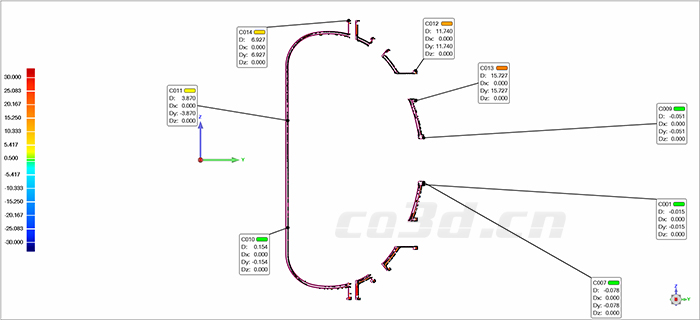
Nuclear device comparison test chart


