Back
Case Case
Disk milling cutter 3D scanning case
Release time:2024-04-26 Views:153
  • A +
  • A
  • A -

        HOLON3D engineers use the precision 3D scanner HL-3DM to 3D scan the disc milling cutter and establish an accurate 3D digital model file (CAD drawing) of the disc milling cutter for modification design and subsequent quality inspection and quality control.

Facing problems

1. The disc milling cutter has a complex shape and many holes, so the efficiency of using traditional measuring instruments is very low.

2. The disc milling cutter is not only small in size, but also has many dead spots. It is impossible to obtain accurate 3D data using an ordinary 3D scanner.
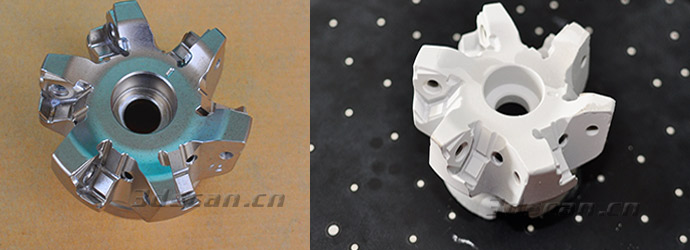
Disc milling cutter actual picture

Solution

        The disc milling cutter is a tool used to mill the plane of the workpiece during machining. As the saying goes, a slight deviation can make a difference. If there is a large error in the position of the screw hole of the fixed blade, it may directly lead to the scrapping of the processed workpiece. HOLON3D engineers proposed a solution, using the industrial-grade 3D scanner HL-3DM (precision type) to collect the 3D data of the disc milling cutter, and then post-processing it through the software to convert the disc milling cutter point cloud data into triangular mesh surface data. Obtain a high-precision three-dimensional digital model of the disc milling cutter.
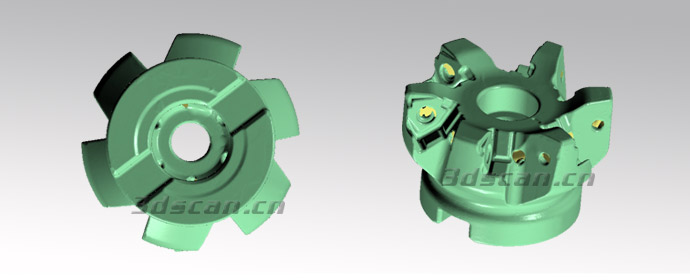
Disk milling cutter point cloud data

         The processed data can also be imported into detection software to conduct detailed analysis of object features, such as hole positions, contours, curvature, etc., and at the same time, it can also capture and reflect the shape and position deviation of the profile. The inspection software can automatically align the measurement data with the coordinate system of the CAD data, thereby achieving rapid comparison inspection and quality control.
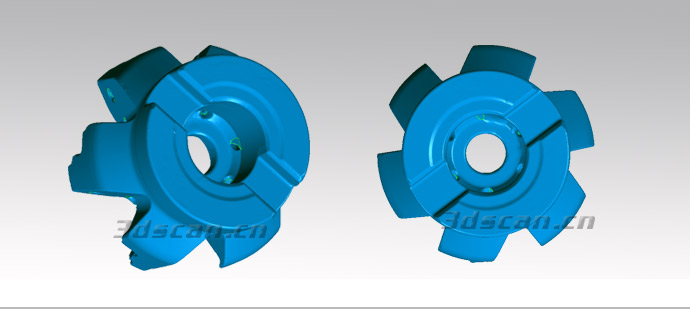
Disk milling cutter STL data
Related Products
HL-3DP
HL-3DP
2024-02-26
The 3D photogrammetry system (HL-3DP) uses a handheld high-resolution (6000×4000) digital camera to take digital photos of the measured object. The 2D digital photo images are superimposed to obtain the measured object's 3D coordinates. This mobile technology can effectively save measurement time in capturing the 3D coordinates of the measured object, quality control (Inspection) and deformation analysis (Deformation).
HL-3DS+
HL-3DS+
2024-02-26
The photographic 3D scanner (HL 3DS+) adopts new coding calibration technology, which is the core mastery and application of 3D photogrammetry technology. It reduces physical distortion and improves the scanning accuracy of original 3D data. Heterodyne multi-frequency phase-shifting grating technology is used to improve the quality of scanning point clouds. It truly has a blue light device scanning system, and the photo-type 3D scanner scans data point spacing up to 0.01mm, which is suitable for scanning fine workpieces. It adopts a new core design concept and applies carbon fiber materials to improve the stability of the product during operation.
Model 69
Model 69
2024-01-24
Model 69 has a total of 69 blue laser lines, including photogrammetry function mode, using 51 cross blue laser lines for large-range mode, standard mode + 17 parallel blue laser lines for precision mode + 1 blue laser line for deep hole scanning; scanning speed is faster, accuracy is higher, and stability is stronger; this product has been widely used in the fields of 3D detection and reverse engineering, and the operation process is flexible and convenient, suitable for various complex application scenarios.